Things You'll Need
Branch
Hockey tape
Hand saw
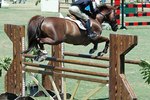
Whips, also called crops and bats, are often carried by a rider in case the horse becomes unresponsive or slow to respond to the rider's leg aids. Some experienced horses are even aware of when they're being ridden by an inexperienced rider who isn't carrying a whip; they'll become slow or stop altogether because they can get away with it. If a rider finds that a horse requires a whip to perform properly but there isn't one available, a few cheap materials can be used to make one.
Cut a thin branch from a tree using a saw. Branches are a good substitute for a whip because they can usually be found in the correct diameter and length for a crop and are often readily available. A fresh, green branch works better than an older, dried-out one because it has much of the same flexibility of a regular riding crop. Ideally, the branch will be no more than a 1/2-inch thick at one end, be tapered toward the opposite end and be as straight as possible.
Remove any twigs that are sticking out from the branch. If they don't pull off easily, a utility knife will usually slice through the small green pieces easily. This will help ensure that the whip doesn't snag on clothing or tack.
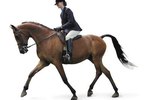
Cut the thickest end of the branch to the desired length. Crops used for jumping are usually less than 28 inches long while dressage whips used for flat work may be up to 40 inches long. If you're using the whip for driving or ground work, it may need to be longer yet.
Wrap hockey tape once around the very end of the branch. Unroll, but don't wrap, 8 inches of tape. Let the roll hang down from the branch; then spin the roll so that the tape sticks to itself. Wrap this rolled tape around the top of the stick to create a knob. Unroll more tape and wind it around the stick, including over the knob. Continue down the branch for 6 inches. This is the same technique a hockey player uses to create a grip on his stick, but with slightly less bulk.
References
Photo Credits
-
BananaStock/BananaStock/Getty Images
Writer Bio
Kate Klassen has been a professional writer and photographer since 2005. She has completed work for notable companies such as The Fight Network, Travelodge and The Yellow Pages Group. Klassen attended the University of Calgary and graduated with a Bachelor of General Studies in communications.