The United States is home to a multitude of different land snails, but most of them have largely the same basic needs. If you plan to raise some baby snails you found in the garden, you almost certainly don’t need much in the way of equipment or expertise. Normally, snails don't make particularly demanding pets, although they do need a suitable habitat and a plentiful supply of food.
Snail Basics
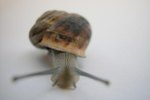
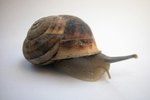
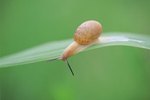
Snails are mollusks, distantly related to squid, clams, cuttlefish and oysters. Specifically, they’re gastropods, along with limpets, slugs and others. Unlike slugs, snails can retreat into their shells when necessary, so they won’t die immediately in dry conditions. They can even seal themselves up and become dormant for a while. However, their skins are not waterproof and so they much prefer damp environments, which is why you often see snails emerging after rain. Most, although not all, land snails are herbivores, munching their way through a variety of plant material, including leaves and fruit.
The House
To maintain humidity and prevent escapes, you need a glass or plastic container. Snails will eat their way out of cardboard, and even if a cage contained them, it would be very difficult to keep it damp enough -- the air in most homes is too dry for optimum snail welfare. A plastic box, such as a large, clean ice cream tub or storage box, is fine, as is a small aquarium. Make numerous holes in the lid with a sharp knife, poking it through from the underside of the lid and twisting. These are necessary for ventilation; just make sure the holes aren’t bigger than your snails.
The Furnishings
Snails don’t need elaborate homes, having only a few basic requirements. Add 2 or more inches of chemical-free potting compost at the bottom of the box. Garden soil is not ideal because it contains a range of other organisms, some of which could be dangerous to the snails. A shelter, such as a large piece of bark or a plant or yoghurt pot on its side would be appreciated. Also include small saucers or lids for water and food. Other decorations, such as moss, are optional and mainly for your viewing enjoyment.
Food and Drink
Unless your snails are an unusual species, they’ll probably be happy with a varied supply of leaves, such as lettuce, cabbage and various weeds, vegetable peelings and scraps from the kitchen, and the odd slice of fruit. Remove any uneaten food when it starts to rot or go moldy. The snails may or may not drink, so provide a small dish of water just in case. Tap water usually contains chlorine or chloramine, which won’t hurt you but are not very good for snails. Preferably, use bottled or rain water. If you want to use tap water, leave some in a bucket for 24 hours to allow the chlorine to evaporate.
Maintenance and Care
Mist the snail house regularly to stop the compost drying out. You’ll need to clean it occasionally, probably about once a week or every two weeks. Transfer the snails to another container, such as a smaller box with air holes and a little damp compost on the bottom. The shells of newly hatched snails are extremely delicate and remain so for a few weeks. As the snails mature, their shells will become tougher, but take care moving them when they are babies. Instead of picking them up with your fingers, just move whatever item they are resting on. Tip out the old compost and rinse the box and shelter before drying them, adding fresh compost and new food and replacing the snails.
References
Photo Credits
-
Rusheng Yao/iStock/Getty Images
Writer Bio
Judith Willson has been writing since 2009, specializing in environmental and scientific topics. She has written content for school websites and worked for a Glasgow newspaper. Willson has a Master of Arts in English from the University of Aberdeen, Scotland.