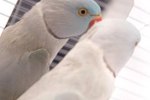
Lovebirds enjoy spending time away from the noise and chaos of the world in an enclosed safe space. You can purchase nesting boxes at your local pet store, or save a little money by constructing one yourself. Building a lovebird nesting box isn’t a complicated affair and can often be done using stuff you already have around the house and some basic crafting supplies.
Step 1
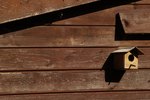
Find a cardboard box big enough for your lovebirds. You can create your own with pieces of cardboard or use an empty box that happens to be the right size. Make sure it didn’t contain anything that might be harmful to the birds. Recommended box size for lovebirds is a 12-inch cube.
Step 2
Tape up the box with non-toxic tape. Seal all flaps so the box is completely closed and no light can get inside.
Step 3
Cut a small hole in one side of the box. This hole serves as the entry and exit point for your lovebirds. A 3-inch hole should be large enough for your lovebirds to move in and out.
Step 4
Punch a couple of small holes one one side of the nesting box so you can secure it inside the birdcage. The box must be secure enough to support the weight of your birds -- you can affix it with a piece of wire. Test its strength by pressing down on it with your hand.
Step 5
Place leaves, newspaper shreds, grass and non-toxic wood shavings in the birdcage. Your lovebirds will use these materials inside the box to build a comfortable nest.
References
Photo Credits
-
Hemera Technologies/PhotoObjects.net/Getty Images